You must be struggling a lot of problems
to know what, and how these prompts work in Stable Diffusion. By the way, its to inform you that the principle of working is entirely different like in other ImaGen black box models like Dalle or Midjourney.
Actually, stable diffusion needs long detailed prompts which is good for any Ai Image Artist because artist don't like biased results. Artist don't like refinements like we get in Dalle and Midjourney which often loses the naturalness. Right?
Let's go through the clear understanding and elaborate a further on how we can master the prompt skills in generating incredible images with Stable Diffusion.
Table of Contents:
Examples:
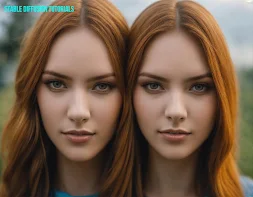
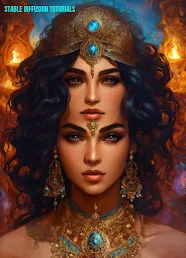

Now, we want to draw attention on these images. Just look into these images generated with some simple prompt feed into the diffusion model. These are some kind of weird results you will get if you provide general prompts without any detailing.
Look at the above picture which has been generated by AI. Here, the user wants to generate an art of a woman with a crying face. But, the prompts that are inputted by the user are very simple, and short without any extra symbols which is very effective in these types of art to get the emotional feelings.
Again, you have noticed the image is quite looking fake and nonsense. The user wanted to make a movie poster art style from the movie "The Blue Lagoon". Due to short, not given suitable prompts, the AI got confused about where the user wanted to relate with the inputting tokens.
Here, you also need to get confirmed that what model you are using, means either its been trained on the images relative to the prompts or not.
Now, this one is horrible. Again short, not enough detailed prompt inputted. The user wanted to generate a human face with terrible facial emotions into it. But, the AI model got confused and generated a face that looked like an Alien with two dirty mouths. It reminded us the Men in Black Movie.
So, to master it first of all we have to know what token (specific words
used in image generation) can be used and all the functions used to get fantastic results.
For illustration, we are using Automatic1111 WebUI, but you can use any other WebUIs like Invoke AI, ComfyUI, Fooocus.
First of all, we have to keep some points in mind while writing the prompts such as the photography style, artist style, color style, lighting effects,
background style, body gesture, face gesture, etc.
Well, Stable diffusion models have been trained with humungous data sets like
clothing style, celebrity faces, and various different camera poses. So, you
can also use these types of effects to get the related effects in the images
you want to generate. By the way, for generating Stable Diffusion Prompts you can try our
Prompt generator.
Tricks to do better prompting
Let's see and try some basic prompts. Here, we are using SDXL1.0 as base checkpoints, but you can choose yours as per your needs.
Portrait of a beautiful woman
Here, we set a batch count of “6” and the sampling method to “Euler” and hit to Generate.
So, in this above generated picture what it generated is quite the basic one.
You will definitely observe that most of the images we generated
are a kind of face image and not the whole body itself.
This actually happened because we provided the basic prompts. The diffusion models are designed in such a way that you need to specifically mention in detail what you want and what you don't.
So, now if we
want something like the body structure in our subject, we need to
modify our prompts. For generating the images of whole body, we need to input our prompts like
this:
Portrait of a beautiful woman in a nice long dress
And here is quite an improved result from the earlier one. Now you can see all the images generated are of the kind of 19th century when women used to dress long beautiful skirts, and gowns.
Here, the Stable diffusion model is trying to differentiate and generate from the trained data sets where women wore some long type of dresses. But, have you noticed that here also it didn’t understand the full body structure of the woman to include in the image.
Now, again we will do some tweaking. We will use something like this:
And this is the results quite impressive. Right?
You will notice that the image just changed from the 19th century to a modern one. This effect we got from the modern tokens(words) we used in the prompts. Like heels which are related to the modern era. So, the model is quite intelligent while choosing the specific dataset and its taking relevant help of the modern trained data sets.
Since we provide only about the woman, that’s why it just focused on the woman and the whole human body structure. But, you can see in the background there is nothing clear justifying the background.
Now, again just modified the previous prompt:
Now, something gorgeous is generated.
Again, just look at the first image of the collage which has generated an extra leg, these are some kinds of inferences that we can remove using the negative prompts. You can add “three legs” into the negative prompt box to remove this problem.
Using Comma for separation:
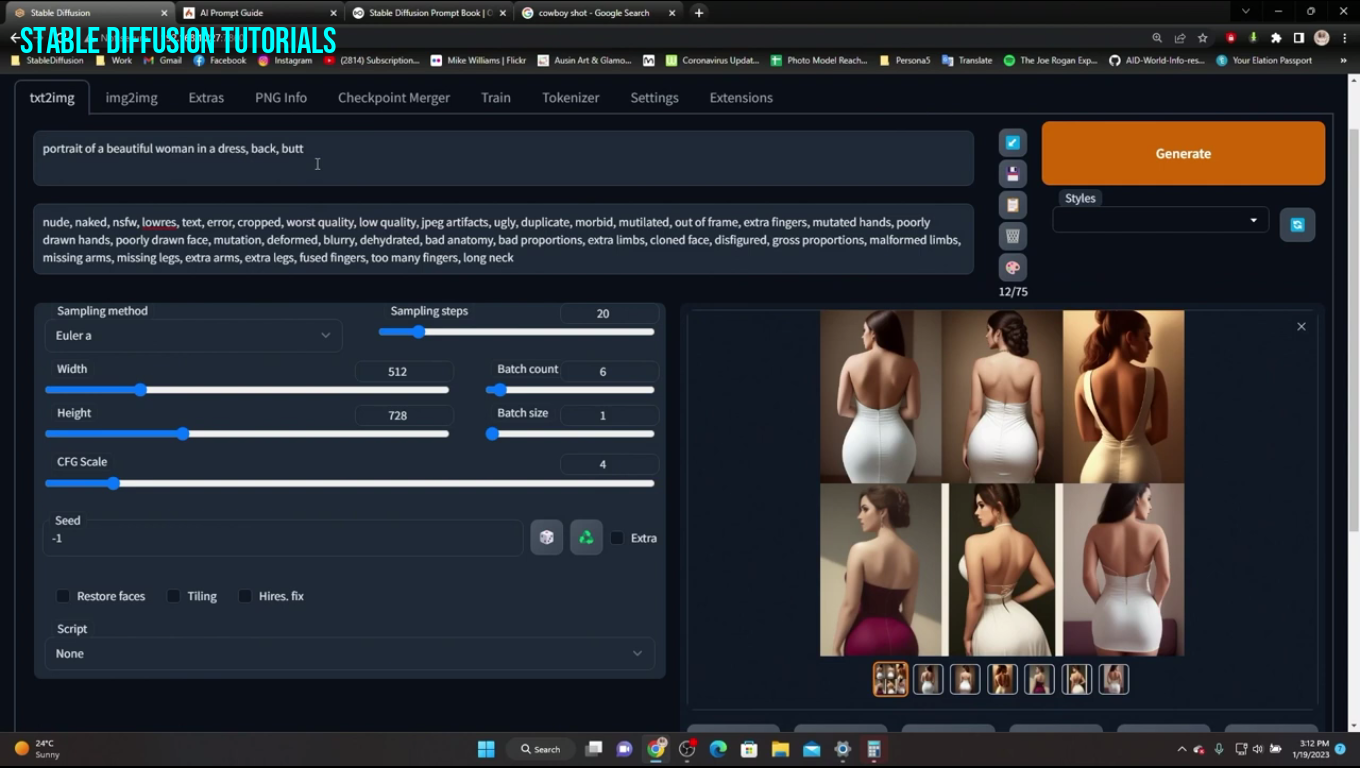 |
| Prompt: Portrait of a beautiful woman in a nice long dress, heels, back |
Note: If we use commas between our prompts it separates the concepts and understands it as independent features.
Now, let's say we have to add some kind of camera pose to our prompt and see the difference.
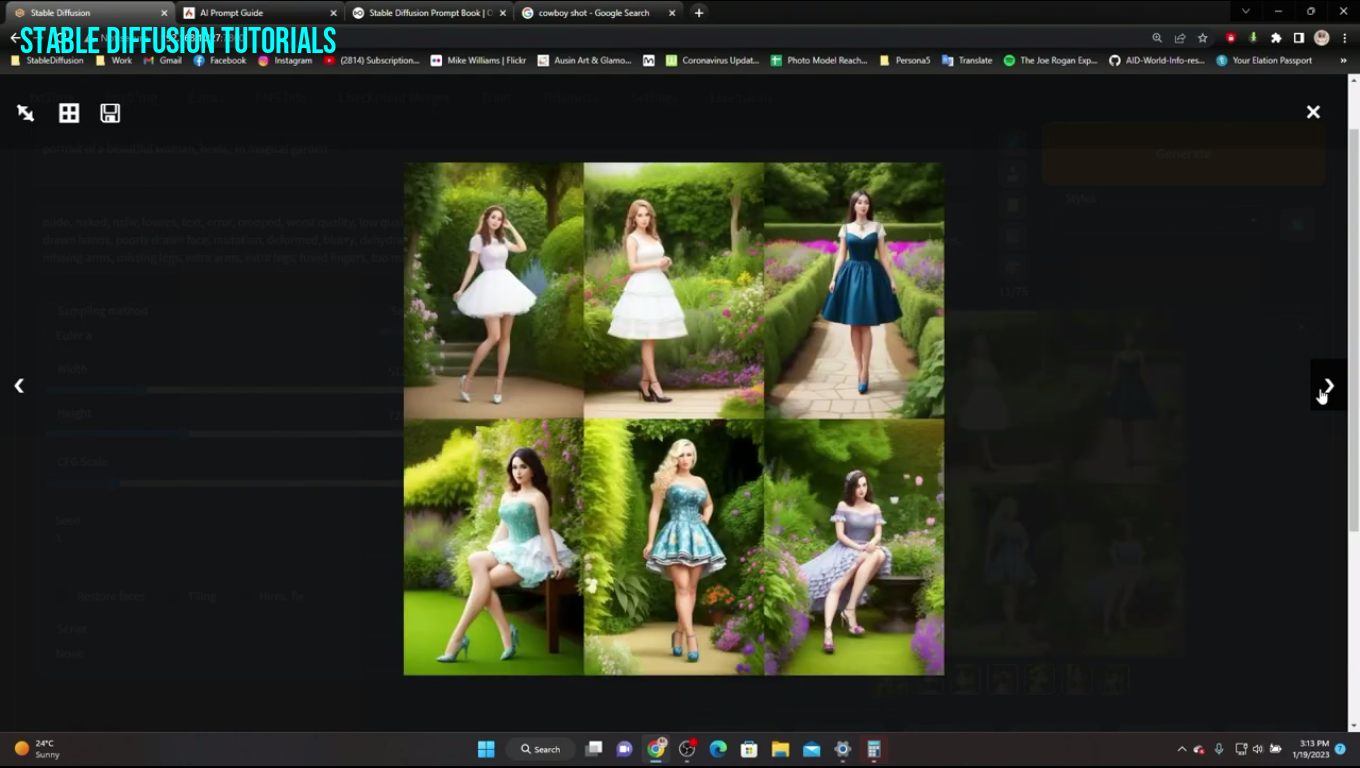 |
| Prompt: Portrait of a beautiful woman, in heels, in a magical garden. |
After using multiple prompts Stable Diffusion for so long we concluded is if you are using too long prompts it, emphasizes (technically called weights) the starting and the ending part of the prompt and gives little focus on the middle part.
Again tried some images with watercolor effect:
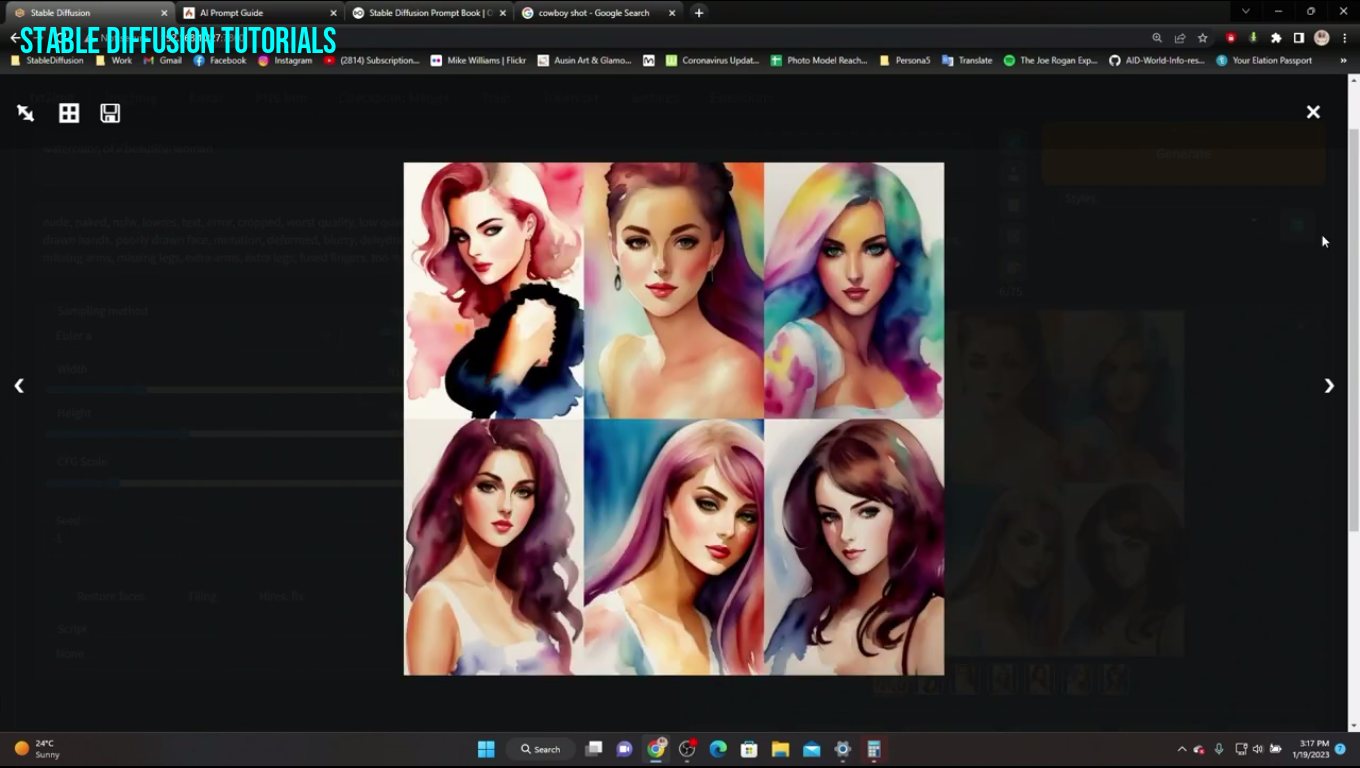 |
| Prompt: Water color of a beautiful woman face. |
So much beautiful and artistic.
Cool!
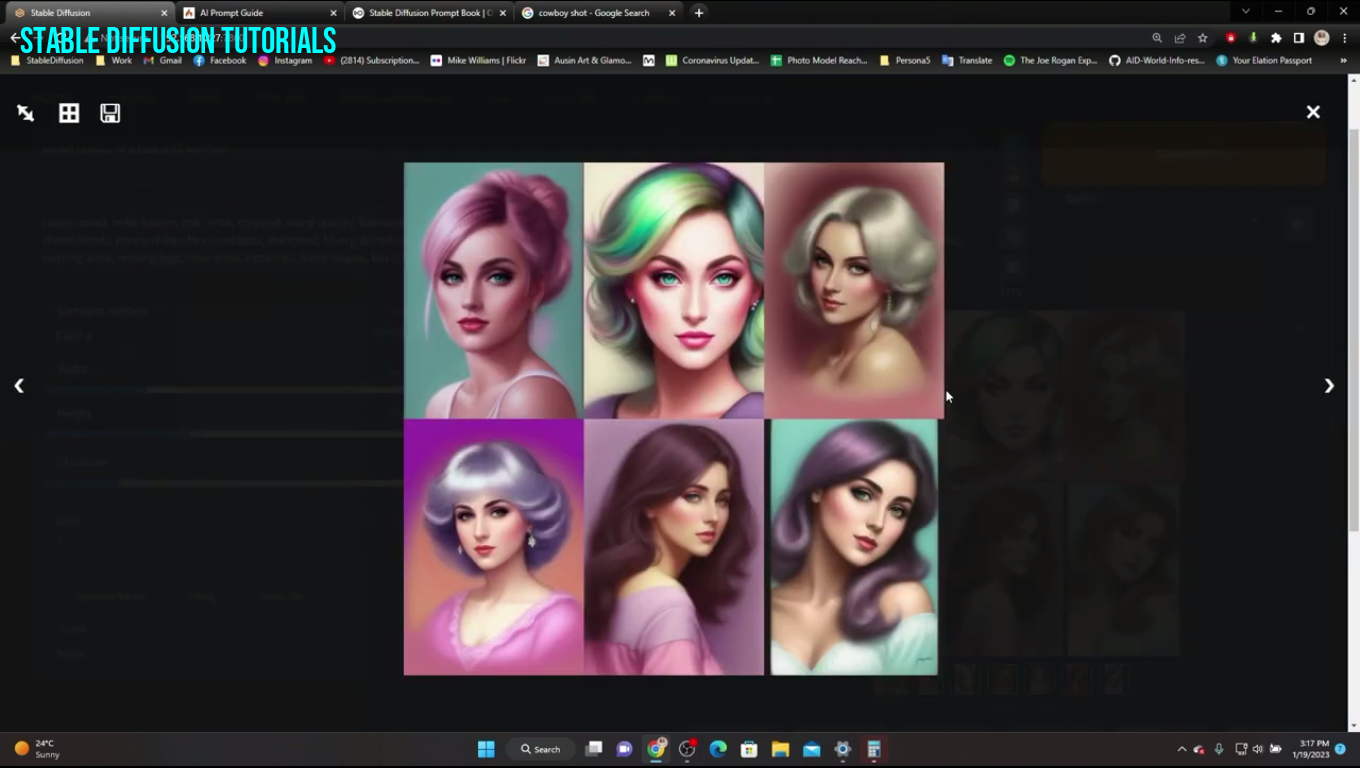 |
| Prompt: Pastel color painting of a beautiful woman face. |
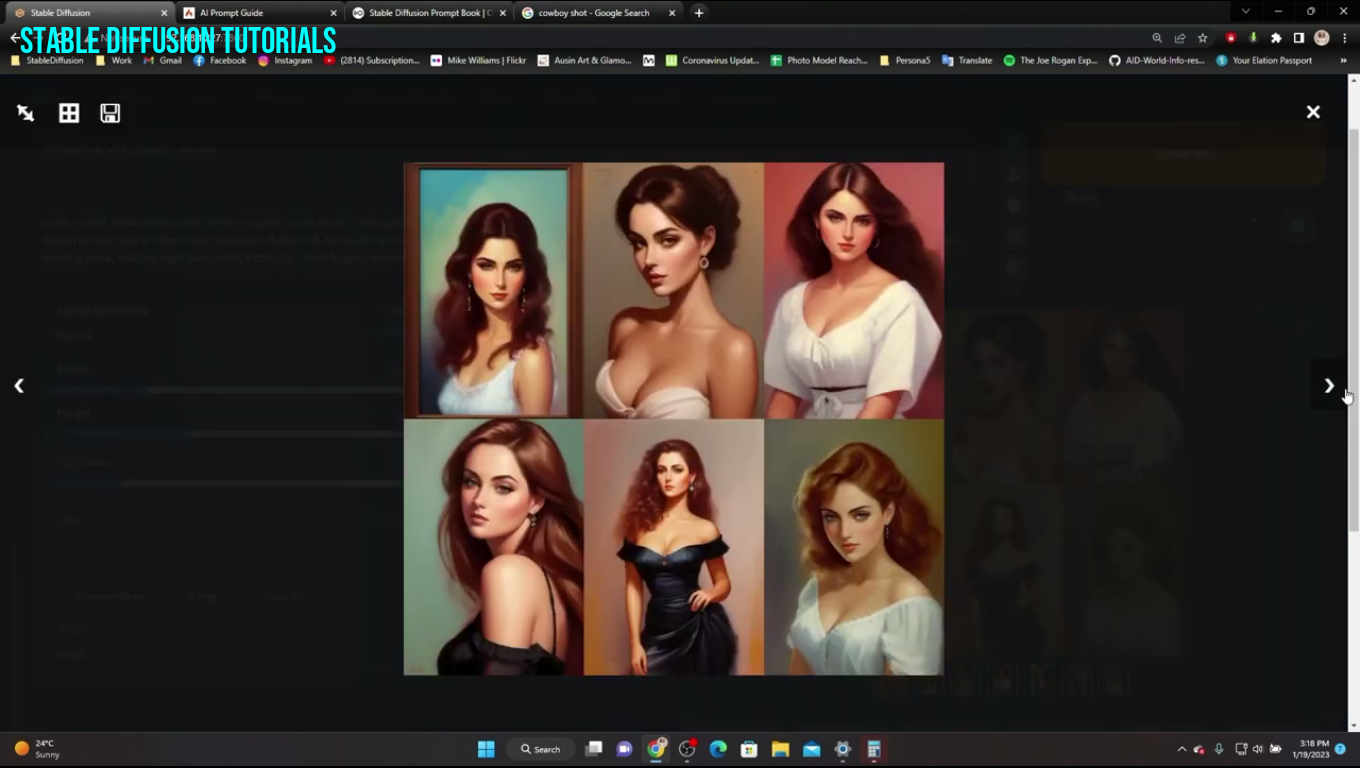 |
| Prompt: Oil painting of a beautiful woman |
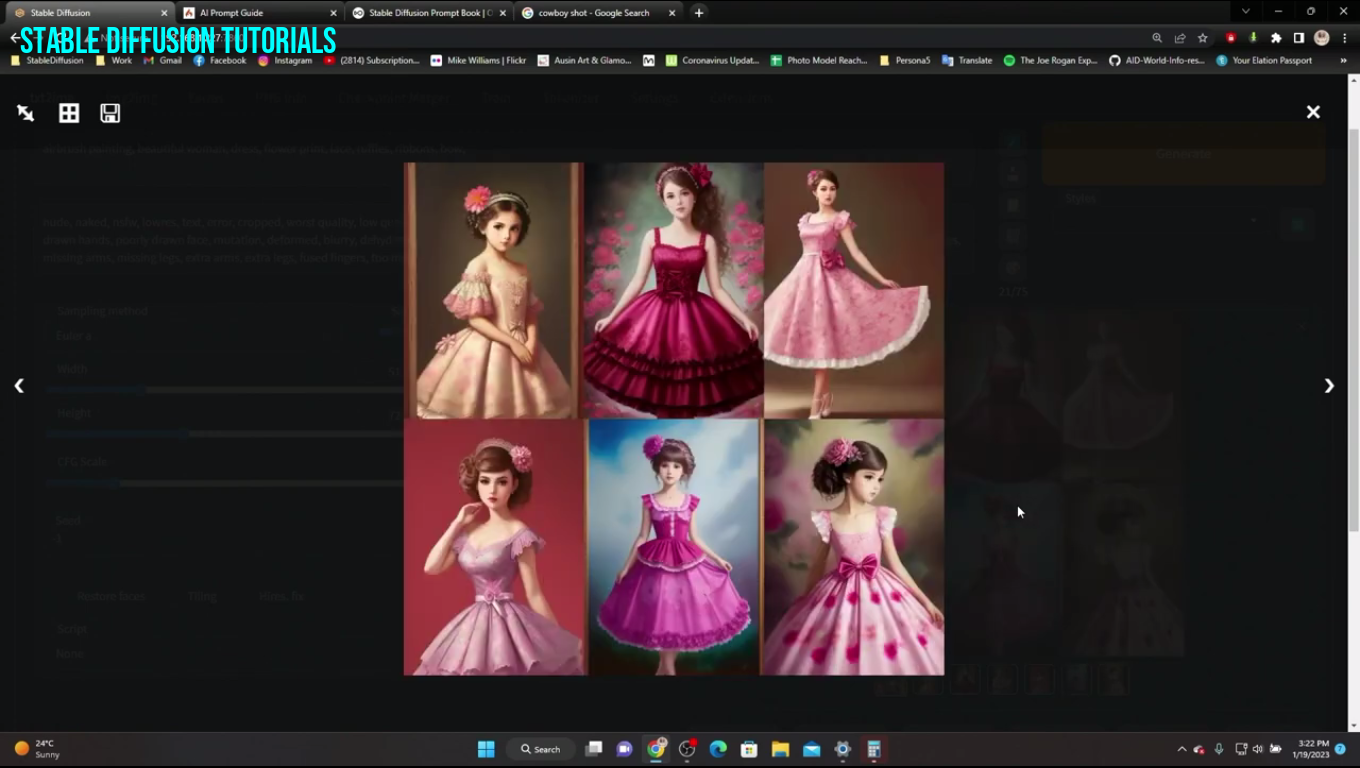 |
| Prompt: Airbrush painting, beautiful girl, dress, lace, ruffles, ribbons, bow |
You can see how the images are getting changed when we input way more detailed prompts into it.
Here, the trained models intelligently detect to generate the images of the kids. Because lace, ruffles, ribbons, and bows are mostly worn by kids the tokens that we have used into it related to kids. So, it's assuming that the users want to get the images of kids.
Use underscores for adding adjectives
Examples:-
Airbrush painting, beautiful_woman
Here, "beautiful" is an adjective.
A dark complexion man wearing blue pants in a vintage car
Here, "dark", "blue", and "vintage" are adjectives.
Using colon
Now, let’s use a colon to get some good effects.
Airbrush painting, beautiful_woman:cat
You can see how these images are with woman and cat characters. So, a colon helps in relating one entity to another. Alternatively, you can also use the word “as”.
Another thing is to be sure not to use extreme color effects because here the Stable Diffusion model sometimes gets confused about what to color or what not to.
Like for example see these images and what we have inputted into prompts with more color effects.
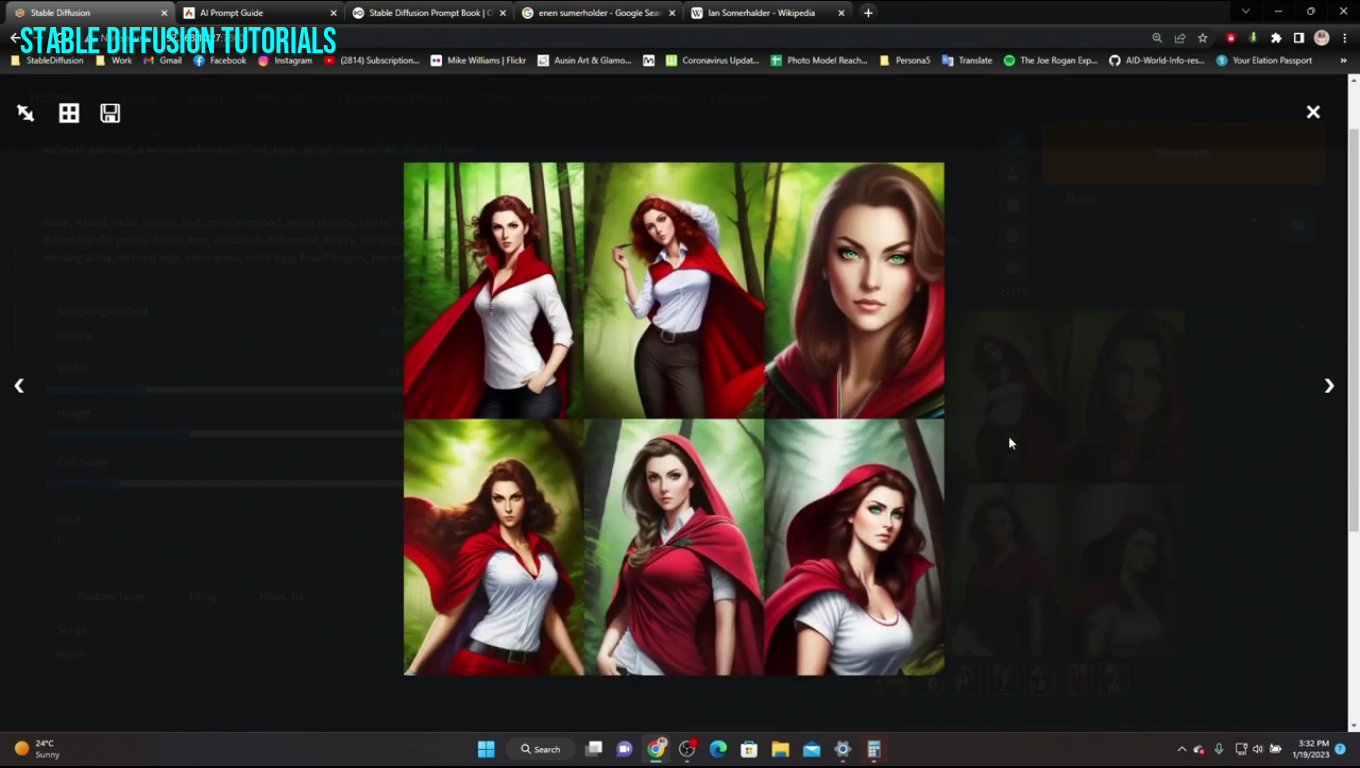 |
| Prompt: Airbrush painting, a woman adventurer, red_cape, green_eyes, white_shirt, in forest |
Here, in the fourth image, we didn’t mention making pants red in color but the AI model did it, which is quite weird, and the red cape is also looking unnatural.
Using Prepositions
Using the prepositions also help the AI model to be focused, detailed and act more on the main subject with other entities.
Airbrush painting, a woman, dress, lace, in magical garden background, night sky
Here, we put “in” as the prepositions for magical garden and it done pretty well and the effect of night sky with backlighting and made the image more fascinating.
Let’s try more prepositions with the prompts.
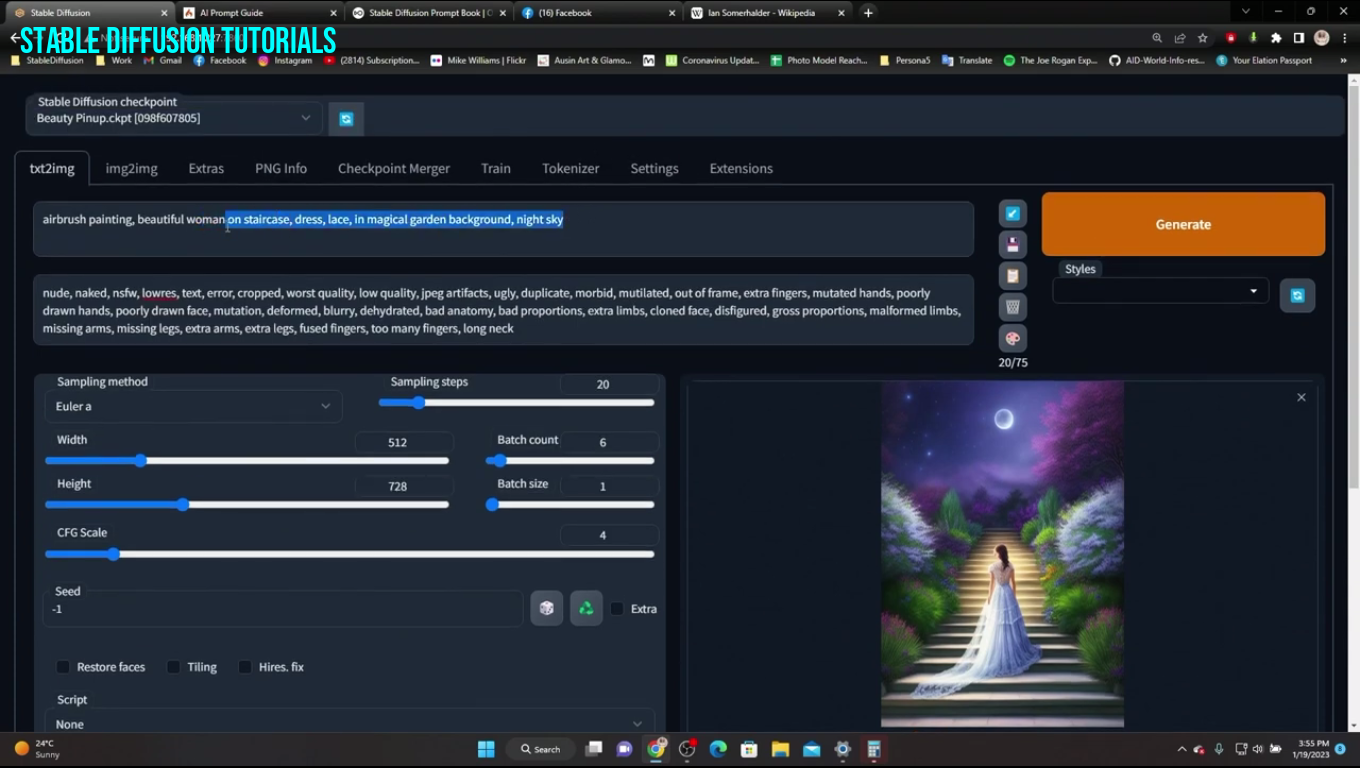 |
| Prompt: Airbrush painting, a woman on staircase, dress, lace, in magical garden background, night sky |
Now, let's try something harder and test if the Diffusion model can do it or not.
Now, you can see we are getting wrong results because the Diffusion model hasn’t trained on such types of prompts which also can yield sometimes inaccurate results.
For that either you need to be sure what the prompt you are using or you can also use the better trained stable diffusion models by downloading from the Hugging face, Civit.ai platforms or you can train your own specific model using Dreambooth, LoRA etc.
Using the image Style
You can also make your image generation more stylized form by adding some extra styling words into prompts.
Let’s check out this one.
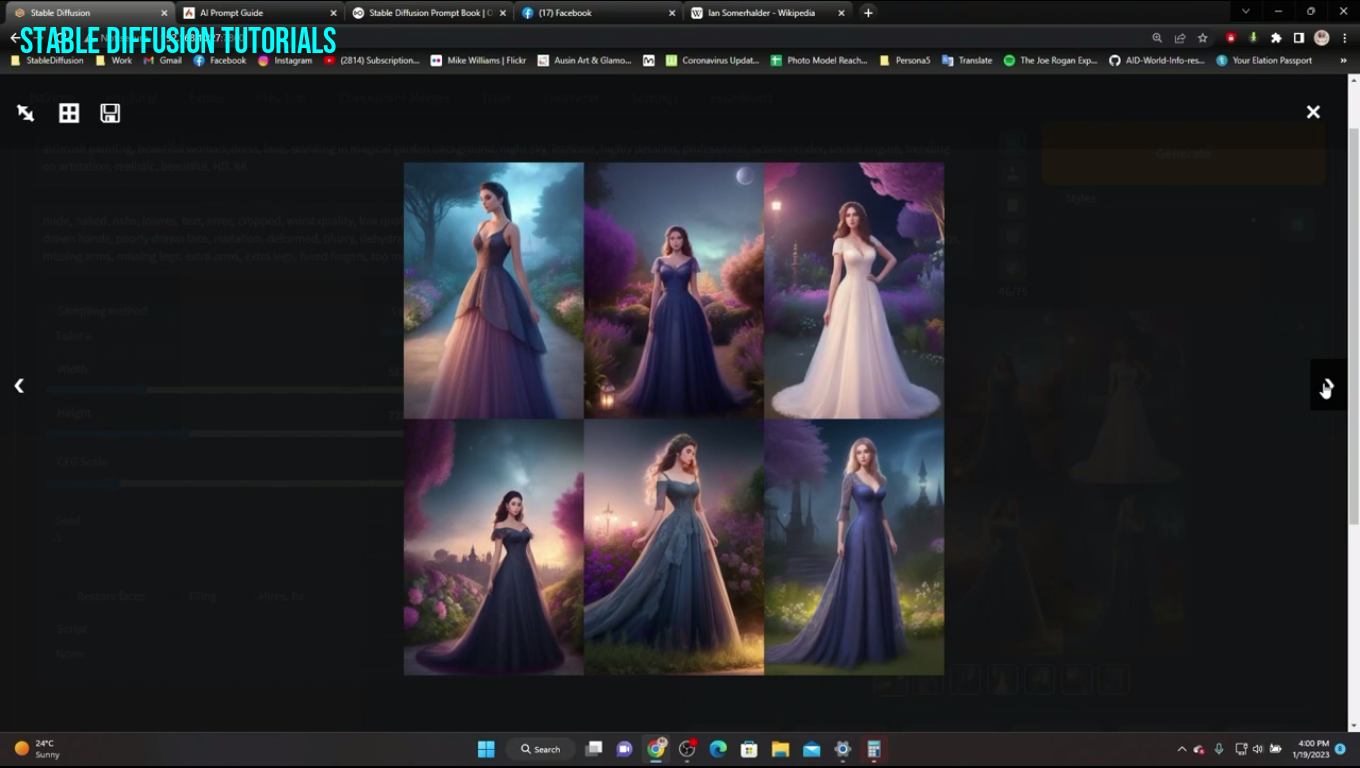 |
| Prompt: Airbrush painting, a beautiful woman, standing in magical garden, night sky, intricate, highly detailing, professional, 8k ultra hd, masterpiece, realistic |
See how we changed the normal prompt into more professional effects with flashy lamp lighting into it to make the more effective. The lace is also seen with more detailed workings on the dress.
Using Artist Style
We were able to figure this out by doing depth research through social media where people were sharing images on Twitter and Instagram using the artist's name in their prompts.
Yes, now there will be a query in your mind about how can you get the artist's name and style.
Well, you can search over the internet, and social media (Instagram, Twitter) or you can use ChatGPT as well to get knowledge about it.
To use this we have to use this format: “by the artist name”
Now, let’s give it a try.
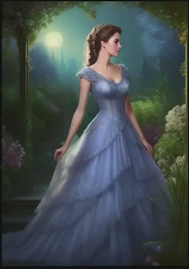

Prompt: Airbrush painting, a beautiful woman, standing in magical garden, night sky, intricate, highly detailing, professional, 8k ultra hd, masterpiece, realistic, by norman rockell
So, you can make the prompt in this format:
[Medium of subject], [YourSubject], [Adjectives other related enitities], [styled effect], [artist name]
After adding the artistic style we got more detailing style and art piece-like effect. The background looks more detailed with moonlight effect which enhances the overall outcome.
Also if you choose the artist name so older then you will get older-styled effects.
So, you need to be sure to add your artistic style at the latter of the prompts and choose the artist's name wisely. This is because the trained models emphasize more on the last part as compared to the other part which generates more accurate results.
Using round and square brackets
You can also use round brackets to emphasize the part of the prompt to tell stable diffusion as well, which gives you fantastic results.
On the contrary, the square brackets help to lower the effect on any part of the prompt.
Prompt: (Airbrush painting, a beautiful woman), (standing in magical garden, night sky), (intricate, highly detailing, professional, 8k ultra hd, masterpiece, realistic,) by norman rockell and Kevin Sloan
So, you can see how from the start till now we got more realistic quality images. Look at her dress, how detailed fine art which looks more natural.
Pretty good!
Now, let’s try to generate some kind of cold weather effect with images :
Here we can emphasize this:
Now you can see how the images add some cold effect as we try to add rounded brackets to the tokens.
Now the Square bracket is used for removing the effect and this can remove the effect by 1.1. In simple words, we can say that it’s the contrary to the rounded brackets.
So, after using the necessary required inputs using the square brackets it gave this as output which is quite impressive.
Using LoRA Settings
If you are using
LoRA models then these tips will help you much in playing with its settings.
If you want to use the power of LORA then you have to use angular brackets to get the effects. Here, in the above illustration, you are seeing how we have added the value that gives the good snow with sunlighting effects. Adding higher numbers increased the sun lighting and vice versa.
For more details about
LoRA training, you should checkout our detailed article where we discussed about every instances what to follow and what not to.
Conclusion:
After getting so much detailed learning we came to conclude that getting the required good results is quite challenging but Stable Diffusion's Community has made our life easier when it comes to image generation.
Using various kinds of predefined rules like brackets, colons, commas, etc helps your art imagination be more impactful than before.


